INTRODUCTION
This document explains the below process with guided steps and screenshots:
- Install Jenkins operator in OCP.
- Create a git repository with sample application code and Jenkinsfile.
- Build pipeline in Jenkins.
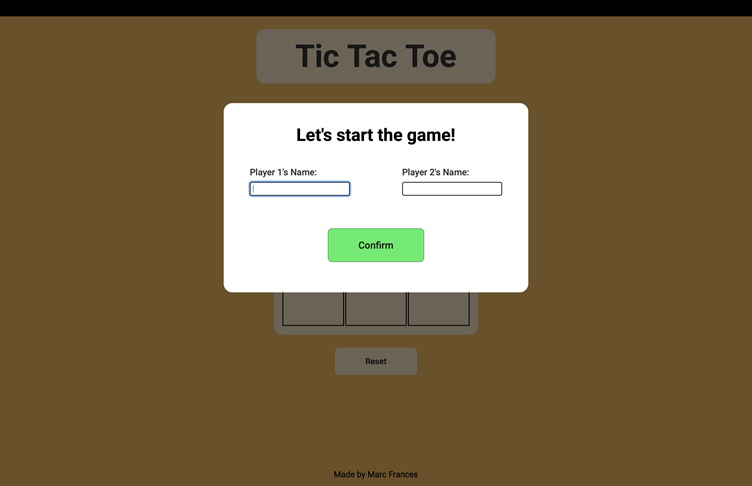
- Deploy a sample application in OCP.
PROCESS
Step 1: LOGIN TO THE OCP CONSOLE
- Login to the OCP console using the credentials.
Instructions to login OCP through cli
- Click on the kube.admin then click on copy login command to login via CLI

- Then a new window opens which will show as displaytoken click on it and the tokens for login will be displayed on the window, use them to login to OCP CLI.
Step 2: CREATE CUSTOM PROJECT/NAMESPACE
- Create a custom project name using below command in CLI which we will use to deploy our application in
oc create ns <your project/namespace name>

Step 3: INSTALL JENKINS INSIDE OCP
- Switch to developer mode inside the OCP console
- Click the ADD+ option in the left side toolbar, click on all services

- Search for Jenkins, then select Jenkins with persistent storage template
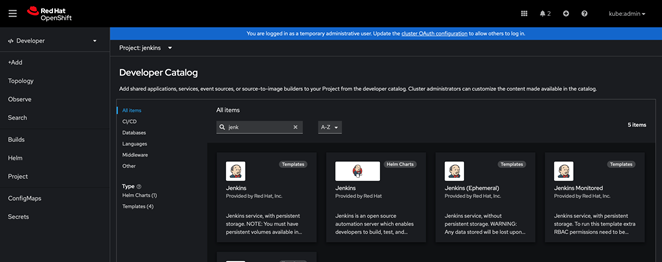
- Click on instantiate the template.

Step 4: LOGIN TO THE JENKINS CONSOLE
- After the instantiation is completed, click on topology in the left menu bar to view the Jenkins pod status
- When Jenkins pod status becomes blue and you can see a URL link icon, click on it to access the Jenkins console.

- Login to the Jenkins console using the same OCP credentials

- It will ask for access permissions, select the tick boxes and click on allow selected permissions
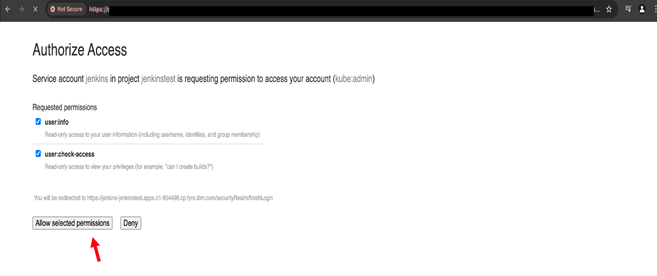
- After successful authorization, you will be redirected to the Jenkins console

Step 7: CREATE GIT REPOSITORY
- Create a new public GitHub repository and add the sample tic-tac-toe app code files from the repo : https://github.com/marcft/tic-tac-toe. (This is just a sample code if you have any other app code, please feel free to use that)
- Create a Jenkinsfile copy the below content and ensure to change the values accordingly
pipeline {
agent any
environment {
OPENSHIFT_PROJECT = “enter your ocp namespace”
IMAGE_NAME = “tictacimg” // can replace with any custom image name
GIT_REPO = “enter your github repo link”
GIT_REF = “main” // if any other branch name you are using please mention that here
}
stages {
stage(‘Deploy APP to OCP’) {
steps {
script {
// declare project name
sh “oc project ${OPENSHIFT_PROJECT}”
// Delete the existing app (DeploymentConfig, Service, ImageStream, etc.) if it exists
sh “””
oc delete all –selector=app=${IMAGE_NAME} || true
oc delete imagestream ${IMAGE_NAME} || true
oc delete buildconfig ${IMAGE_NAME} || true
“””
// Deploy the application using OpenShift
// sh ” oc new-app openshift/nginx~${GIT_REPO} –name=${IMAGE_NAME} –source-secret=${SECRET} –allow-missing-images “
sh ” oc new-app openshift/nginx~${GIT_REPO} –name=${IMAGE_NAME} –allow-missing-images “
//pass git creds to build config and start build again to apply
sh “oc patch bc/${IMAGE_NAME} -p ‘{\”spec\”:{\”source\”:{\”git\”:{\”uri\”:\”${GIT_REPO}\”,\”ref\”:\”${GIT_REF}\”}}}}’”
sh “oc start-build ${IMAGE_NAME}”
}
}
}
stage(‘Expose Service’) {
steps {
script {
// Expose the service to make it publicly available
sh “oc expose svc/${IMAGE_NAME}”
}
}
}
}
post {
success {
echo ‘Pipeline completed successfully.’
}
failure {
echo ‘Pipeline failed.’
}
}
}
The overall file structure should look like this

Step 8: CREATE PIPELINE IN JENKINS
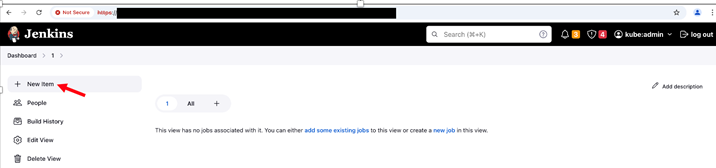
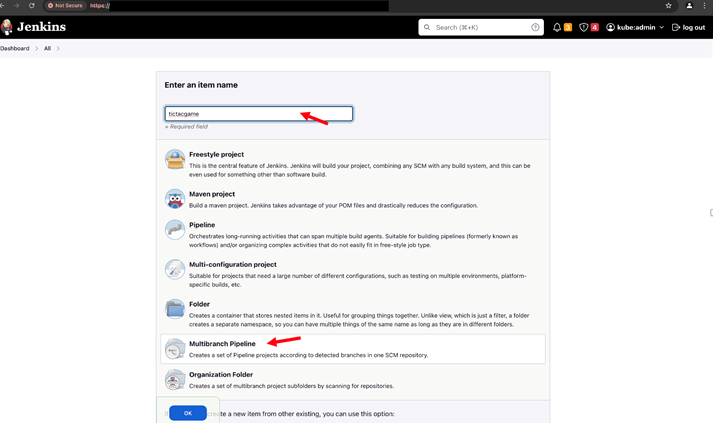
- In Jenkins console Click on New Item
- Select multibranch pipeline and enter the name of pipeline
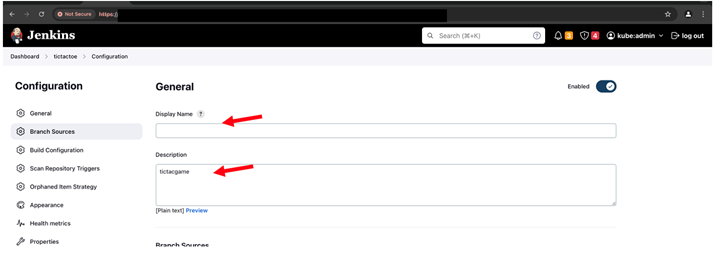
- Enter display name and description
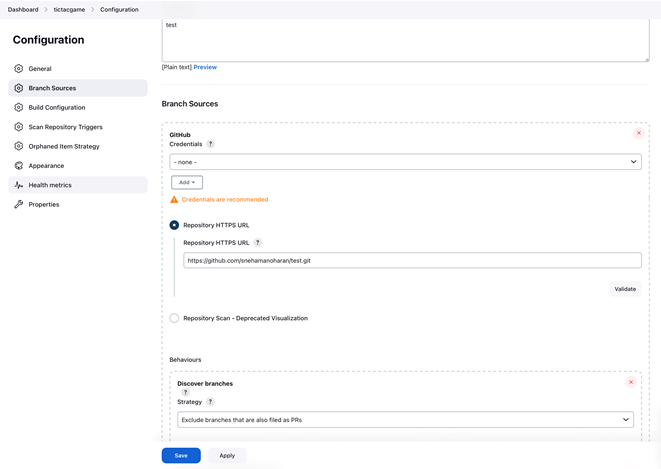
- Under branch sources section , paste your GitHub URL inside the repository https URL input box.
- No need to give any GitHub credentials.
- Click on Apply and then save button .
- Click on scan repository and the git repository branches will appear here.
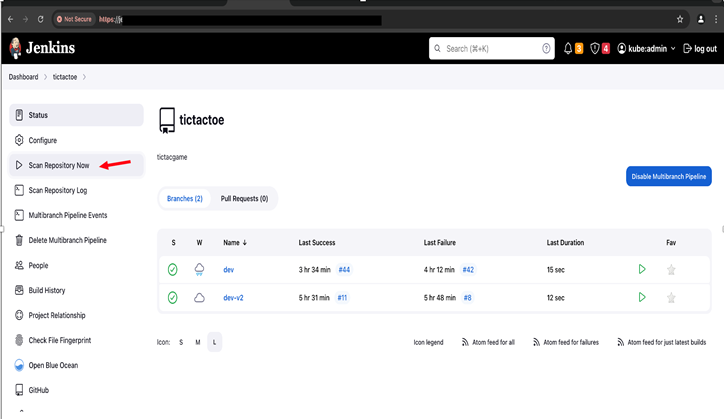
- Based on the pipeline code in the Jenkinsfile here the pipeline will be created and will start executing once you click on build now.
- Check the console output to see the logs

- After successful pipeline completion, go inside the OCP console
- Navigate to developer mode, then select topology
- The newly launched application pod will be displayed, click on it to see the URL
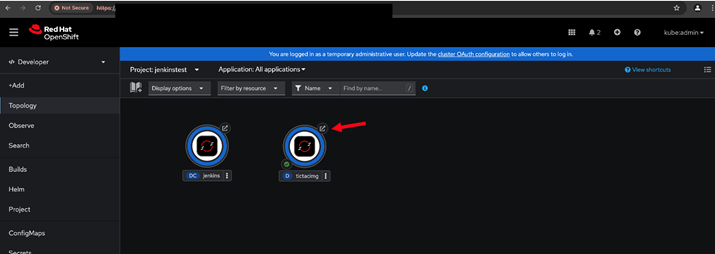
- Click on that link button to launch the application webpage.